


In my last post, around Passover, I made (finally) successful microwave matzah balls more or less the same way I make microwave-to-frying-pan felafel, but then I realized I’ve never actually posted on how to make microwave-assisted felafel or why you might want to. So before getting into what I was hoping would be a nice quick extra, the eggplant pickles you need for a great streetside felafel pita (next post), I decided I should really put in a word for microwave-assisted felafel.
Felafel stands were few and far between in most of the US even before the pandemic hit, and most people still don’t make their own felafel at home, even from the available box mixes, because deep fat frying is expensive on oil and frankly kind of a pain.
If you’ve never eaten felafel, they’re kind of a crunchy, spicy fried vegetarian meatball made with chickpeas, favas, or a combination. At Israel’s felafel stands, Jewish or Arab, you get them served in a pita pocket and ask for whichever additions you want from a huge selection: finely chopped tomato/cucumber salad, tehina and hummus, harissa or z’khug, sour/spicy mustardlike sauces like hilbe (fenugreek-based) or amba (mango-based), sour pickles (the aforementioned eggplant pickle is my favorite and therefore obviously the best), sometimes they even squeeze in a couple of french fries, which I really don’t get, but to each their own, which is the point. All that ends up overstuffed precariously into the pita with the three to five felafel. As with a food truck burrito, there’s an art to dealing with it: you try hard to eat it before it falls apart and do your best not to drip all the different simultaneous sauces on your clothes.
The home version is a little easier, once the felafel are cooked, anyhow, but probably a little less exciting.
You might think that with all the toppings, the felafel would somehow get lost in the mix. But the felafel themselves are actually mission-critical. Especially at home, where you’re, as my mother would say, “Not a Restaurant” and not offering every possible permutation and topping ever, so the felafel are going to stand out more. They actually have to be good or it’s not a party.
Box mixes (Near East, Sadaf, etc.) tend to lean heavily on salt instead of more complex flavorings and they’re often pretty dry because people don’t let them hydrate and absorb water well enough before frying, so they’re never going to be great unless you doctor them with some extra fresh ingredients, and by that time you might as well make a really good felafel mix from scratch, which is what we’re doing today. It’s not actually much more work, it tastes a lot better, and the cooking, especially if you take advantage of a microwave, is lighter, easier and less dangerous as well.
GOOD felafel (I’m about to get seriously opinionated here–take it or leave it):
To get the best out of felafel, classic or microwaveable, what you’re aiming for is a crunchy browned ungreasy outside and a fluffy, cooked-through-but-tender-and-moist inside. And preferably flavored with something better and fresher than the usual box mix bare minimum dusting of faded cumin and garlic powder overcome by a ton of salt. And the main thing, which Whole Foods still doesn’t get–felafel must be served hot and crisp. Not refrigerated and thus leaden in the salad bar. And not dried out and tough to swallow–you don’t want to be biting into a golf ball.
So step one is to make your own felafel mix in a food processor or blender with a couple of cups of drained chickpeas plus fresh ingredients to taste.
Israeli chefs insist on raw soaked chickpeas for the classic deepfrying version of felafel–but this may not be so good if you’re microwaving, because they may not cook through well enough. I find that well-drained home-cooked chickpeas (I’m using my updated microwave black bean method these days) or well-rinsed and drained canned chickpeas work fine, and for that matter, so does chickpea flour made up to a thick paste with water and left to sit a while before blending in the other ingredients. I’ve even made pretty decent microwave-to-frying-pan felafel using leftover thick-from-scratch hummus as a base (note: NOT commercial supermarket hummus, which is too thin and too oily, with too little actual chickpea content, plus the taste is kind of shvach).

The all-important other ingredients are spices (cumin and garlic at a minimum) for flavor, a little flour for backbone, a dash of baking soda for fluff, plus–and this is where fresh beats the box–fresh vegetables and herbs for flavor, moisture, body, and general lightness of being. Onions and a good handful of parsley or cilantro–cilantro for preference–are typical but you can also sub in a chunk of cauliflower or zucchini in the food processor for maybe up to a quarter of the chickpeas and it’ll help keep the moisture. Other spices you might not have thought of but which give a more authentic and aromatic touch (in subtle pinch-not-spoonful amounts) include allspice, coriander, and caraway. Any of these in small amounts blends well with the cumin and garlic and elevates felafel above the standard box-mix “salt bomb” style.
When you’re happy with the mixture, process the whole deal until it’s a coarsely ground mixture that holds together with the chickpeas, onion and herbs in bits the size of toast crumbs or so, not too lumpy but also not too smooth or pasty (unless of course you went with chickpea flour or hummus as a base, but the added veg will still give it a little texture).

As with the matzah ball mixture from April, when you microwave, you want a little more moisture in the felafel mix to start with because the microwave tends to dehydrate foods. You want the mixture ground fairly fine, capable of holding together and mounding up when you scoop spoonfuls onto a plate, but you might add a drizzle of water–just a tablespoon or two–to the food processor and make sure the mixture’s actively moist if it’s still crumbly or too firm–you don’t want soup, but you don’t want concrete.
Microwave-to-frying-pan felafeling
Step two is cooking the felafel well without deep-frying and a ton of cleanup. The trick here, as with the matzah balls, is to steam the felafels first in the microwave on a plate until they’re just cooked through and holding together but not dried out inside. Then brown them in a nonstick pan or on a sheet of tinfoil in the toaster oven with just a drizzle of oil to crisp up the outsides. They won’t be the ideal spherical felafel and they won’t be quite as all-over browned as deep-fried but they’ll taste decent and be at least somewhat crunchy, and they’ll be moist inside and not like chewing a golf ball.
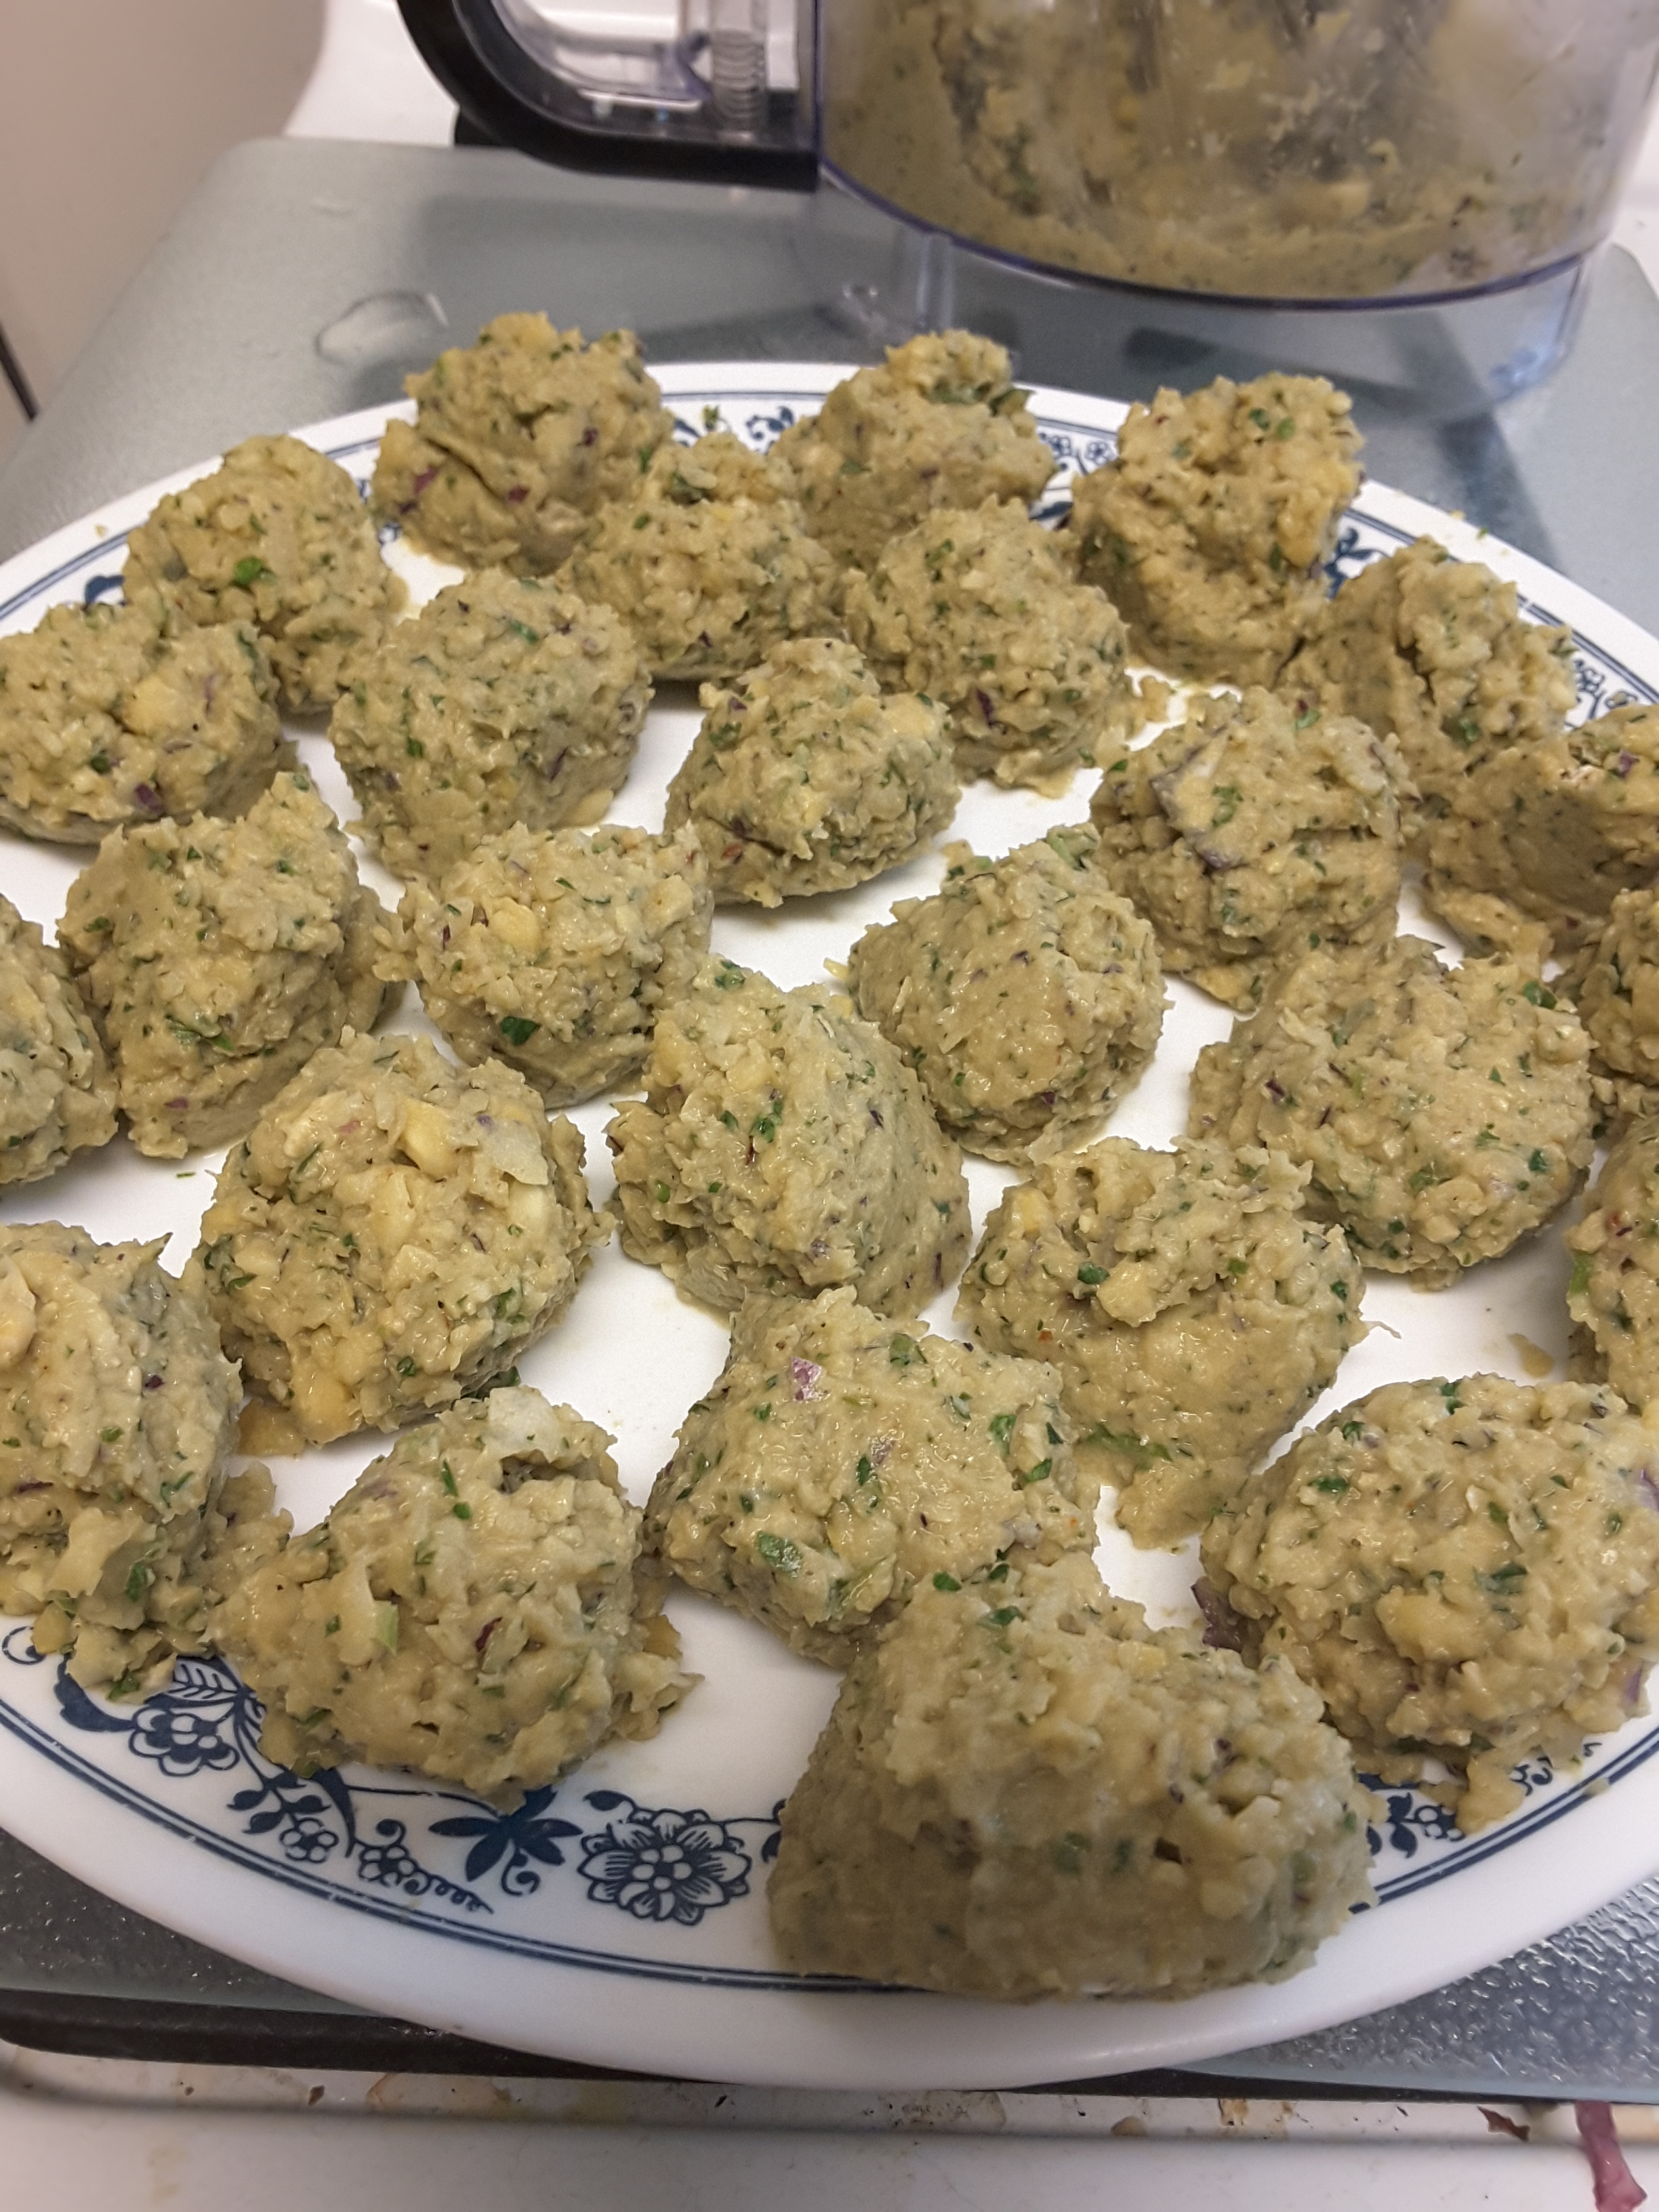
Before and after microwaving

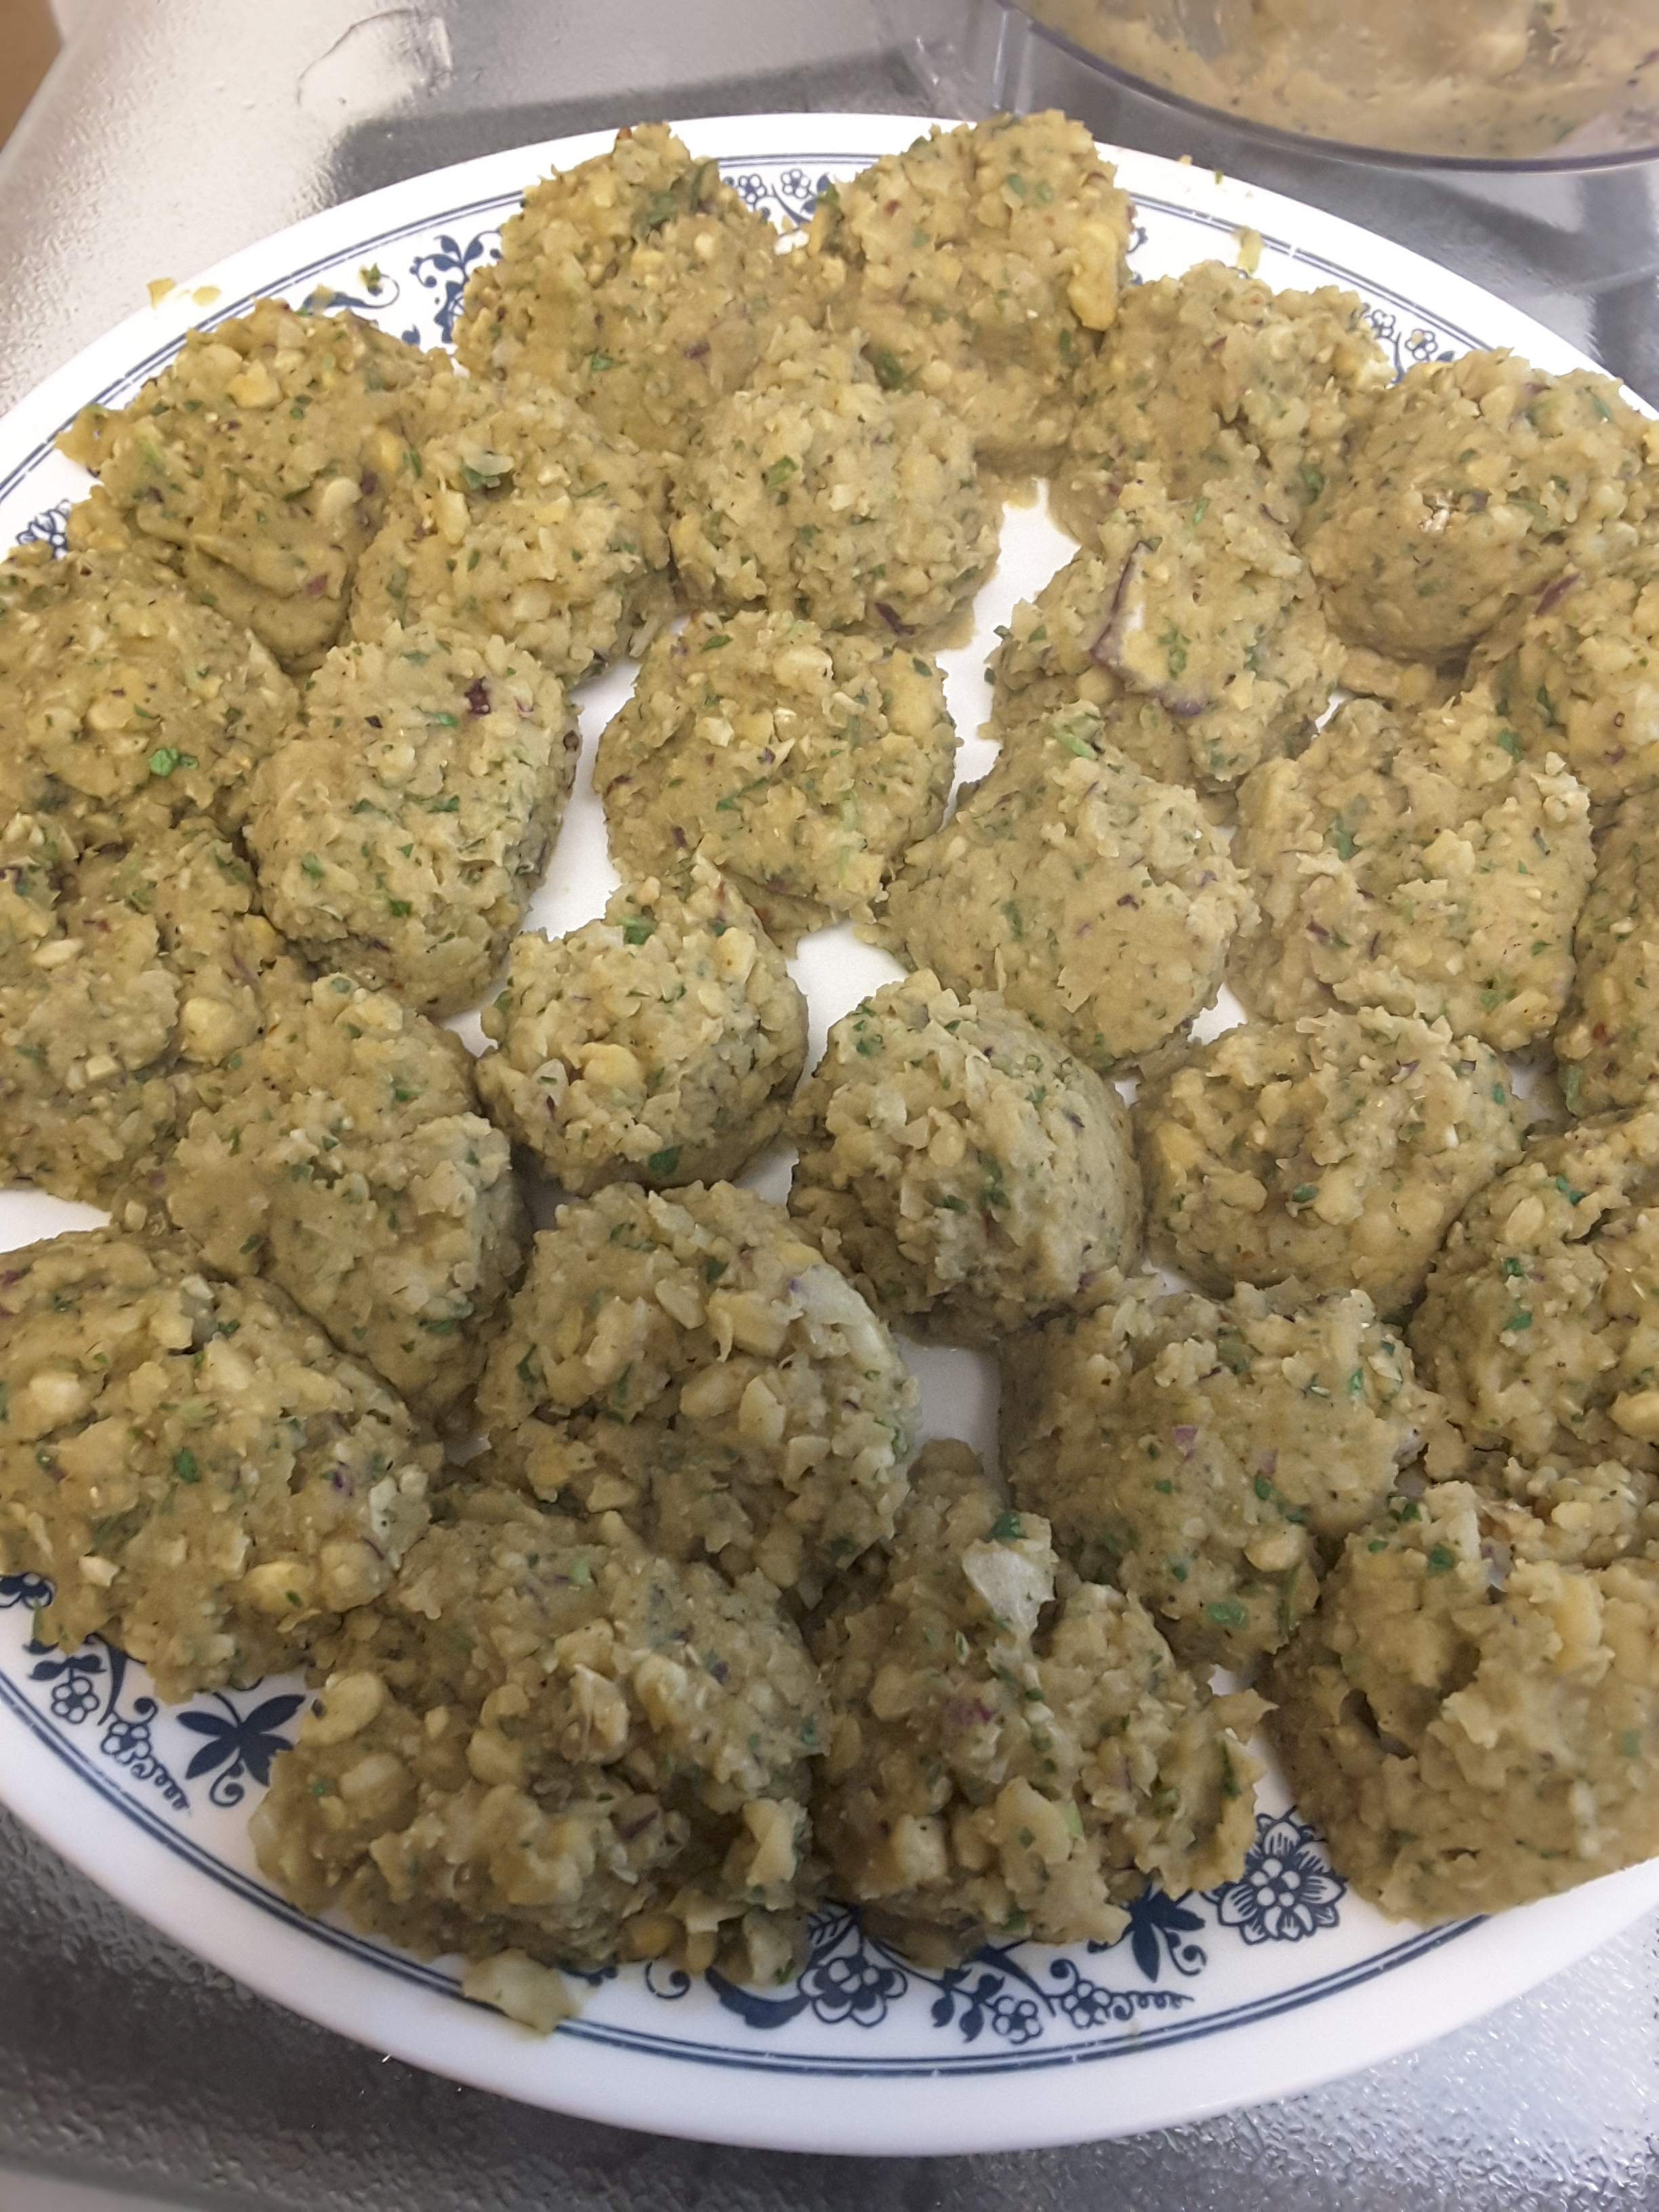
Browning the microwaved felafels
This recipe makes a fair amount, 48-50 felafel or about 8-10 servings of 5-6 felafel each. I can fit about half the batch, 24-25 mounds, on a Corelle-type dinner plate, so I generally dollop out and microwave the second half while the first half is browning in the pan. The total time other than digging out ingredients to throw in the food processor is only about 30 minutes. But you can microwave and then toast or pan-brown just enough for the moment and store the rest of the mix in the fridge for a day or so if you don’t want to do the whole batch at once. If you do cook them all, they reheat well over the next day or so in the microwave–a minute or so in a snaplock container with a tiny sprinkle of water and a lid should do it, and you can restore any crunch you feel they’ve lost by toasting them on foil in the toaster oven or in a nonstick pan for a few minutes after they’re steamed.
Homemade felafel
Makes about 48-50 1″ felafel
Ingredients
Chickpeas:
- About 4 cups of whole cooked chickpeas, fresh or else canned and rinsed, or 3-ish cups of thickened-up chickpea flour/water paste or thick homemade hummus as the base.
For add-ins:
- a good chunk of onion (1/4 medium/large onion)
- a minced, mashed or grated fat clove of garlic
- optional large handful of cilantro (coriander) leaves, chopped
- optional: a half-cup of chopped cauliflower or zucchini
- teaspoon amounts of ground cumin and coriander seed
- optional pinch of allspice or caraway
- grinding of black pepper or shake of hot pepper flakes to taste
- a scant quarter to half a teaspoon of baking soda
- a squeeze of lemon
- keep the salt way down, maybe half a teaspoon
- a heaping tablespoon or two of flour for backbone–>>For food safety, add this last, only after you’ve tasted the mix and made whatever adjustments you want. NEVER eat uncooked flour (often contains salmonella and friends).
For pan-browning or browning in the toaster oven:
- a few spoonfuls of olive or neutral unsaturated vegetable oil
Pulse the mixture to grind it down in a food processor until reasonably fine, but not completely smooth and pasty like hummus. Add a drizzle of water–a tablespoon at a time–just as needed so the mixture feels moist and holds together.
Use two spoons to make 1″ mounds of felafel mix on a microwaveable, preferably Corelle-type, dinner plate with about 1/4″ to 1/2″ of space in between the mounds–they will expand. You can fit them all the way out to the rim, maybe 24-25 felafel or about half the mix. Deal with one plateful at a time.
Microwave about 3 minutes on HIGH and check for doneness. The felafel should all have expanded during cooking and the outer surface should be just dry (tender, holding together well, cooked but not tough–think the surface of a muffin). Lightly touch the top of one somewhere in the center of the plate to make sure it’s not still raw inside–it will be steamed and soft, but shouldn’t be gooey or cave in easily. Add time in 30-second increments if necessary–every microwave is different, so your times might be different from mine.
Heat a spoonful or so of olive or salad oil in a nonstick pan and spread it to coat the bottom of the pan. Carefully slide the felafels off the plate and into the pan in one layer and let them sit undisturbed for a few minutes until they brown on the underside, then flip very gently with a spatula and let the top side brown. If you need a little more oil at this point, drizzle a capful around the outer edge of the felafel in the pan and shake the pan gently back and forth to distribute.
While the first batch is browning, you can rinse the plate off and dollop the other half of the mix onto it to microwave.
B’te’avon, bon appétit, mangia bene, eat nice–hafla! (feast!) And stay as cool as you can this week. May the heat dome break up and give us some relief here in the southwest!

Filed under: Beans and legumes, Microwave tricks, Revised recipes | Tagged: cooking, food, Middle Eastern food, vegetarian |
